

The Birth of Ceramic Glazes
The First Accidental Glaze: A Discovery in Fire
Thousands of years ago, somewhere in Mesopotamia, a potter leaned over a fire, inspecting his wares. The clay vessels, coated with mineral-rich dust, had been exposed to intense heat. To his surprise, some of the surfaces had melted into a thin, glassy layer. The first accidental glaze was born.
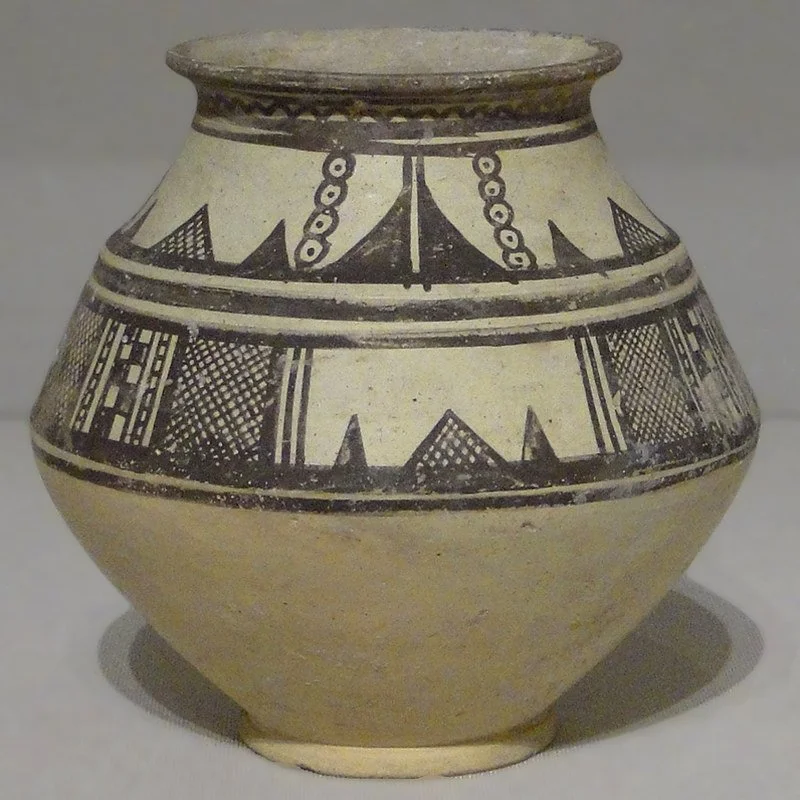
Early potters may not have understood the chemistry, but they recognized the beauty. The effect was likely caused by naturally occurring alkalis—perhaps ash or desert salts—melting over the surface. The concept spread, and by 1500 BCE, Egyptian artisans were using alkaline glazes to coat their faience beads and tiles in mesmerizing blues and greens.
Early Alkaline Glazes: The Chemistry of Faience
Faience is not a true ceramic but rather a silica-based material coated in an alkaline glaze. Unlike clay, its core consists of crushed quartz or sand, which becomes fused with a soda-rich glaze during firing. This technique was perfected by the ancient Egyptians, who used copper-based colorants to create vibrant hues reminiscent of turquoise and lapis lazuli. Faience was widely used for beads, amulets, figurines, and decorative tiles, often associated with religious and ceremonial purposes.
Egyptian faience, one of the earliest known ceramic glazing techniques, relied on an alkaline glaze composed primarily of soda (sodium compounds) sourced from dry lake beds or plant ashes. These soda-rich compounds acted as fluxes, lowering the melting point of silica to create a glossy, glass-like surface. Potters often mixed copper into the glaze to achieve the signature blue-green hues, reminiscent of turquoise and lapis lazuli.
Similar alkali-based glazing techniques appeared in Mesopotamia and later spread to other regions. The use of naturally occurring potash (potassium compounds) from plant ash also played a role, leading to early variations of alkaline glazes in different cultures.
The Role of Lead and Ash in Early Glazing
While Egyptians mastered alkaline glazes, another discovery was brewing in the Bronze Age Near East and China. Potters experimenting with lead ores found that lead melted at a lower temperature and formed a clear, glassy coating over their ceramics. By the time of the Roman Empire, lead-glazed ceramics were widespread, offering a smoother, more durable finish.
Meanwhile, in China, another breakthrough was unfolding. Potters working with high-fired stoneware discovered that wood ash, when carried by flames, fused onto the pottery surface. These ash glazes, precursors to the famous celadons of later dynasties, marked a turning point in glaze development.
Modern Equivalents of Ancient Alkaline Fluxes
Today, modern ceramicists use synthetic or refined materials to replicate the effects of ancient soda and potash glazes. Soda ash (sodium carbonate) and nepheline syenite serve as modern soda-based fluxes, while potassium feldspar provides a reliable substitute for natural potash sources. These materials allow for greater control over glaze chemistry, ensuring consistency while still honoring the ancient tradition of alkali-based glazes.
Experimentation and the Birth of Artistry
As potters refined their techniques, they began to intentionally mix minerals to achieve different effects. Copper yielded greens and blues, while iron produced browns and reds. Some of the earliest examples of true glaze control come from Mesopotamia, where artisans created vibrant, glassy surfaces to adorn their ceramics.
A Legacy of Discovery
The earliest potters were not chemists, but they were experimenters—curious minds drawn to the mystery of fire and transformation. Their discoveries laid the foundation for all modern glazing techniques, from traditional wood ash glazes to the colorful stains used today.
So next time you hold a glossy mug or admire an ancient vessel, remember—the magic of glazes began with chance, fire, and the relentless pursuit of beauty.
#AncientGlazes #PotteryOrigins #CeramicAlchemy
Bisque: the threshold between what was and what could be.
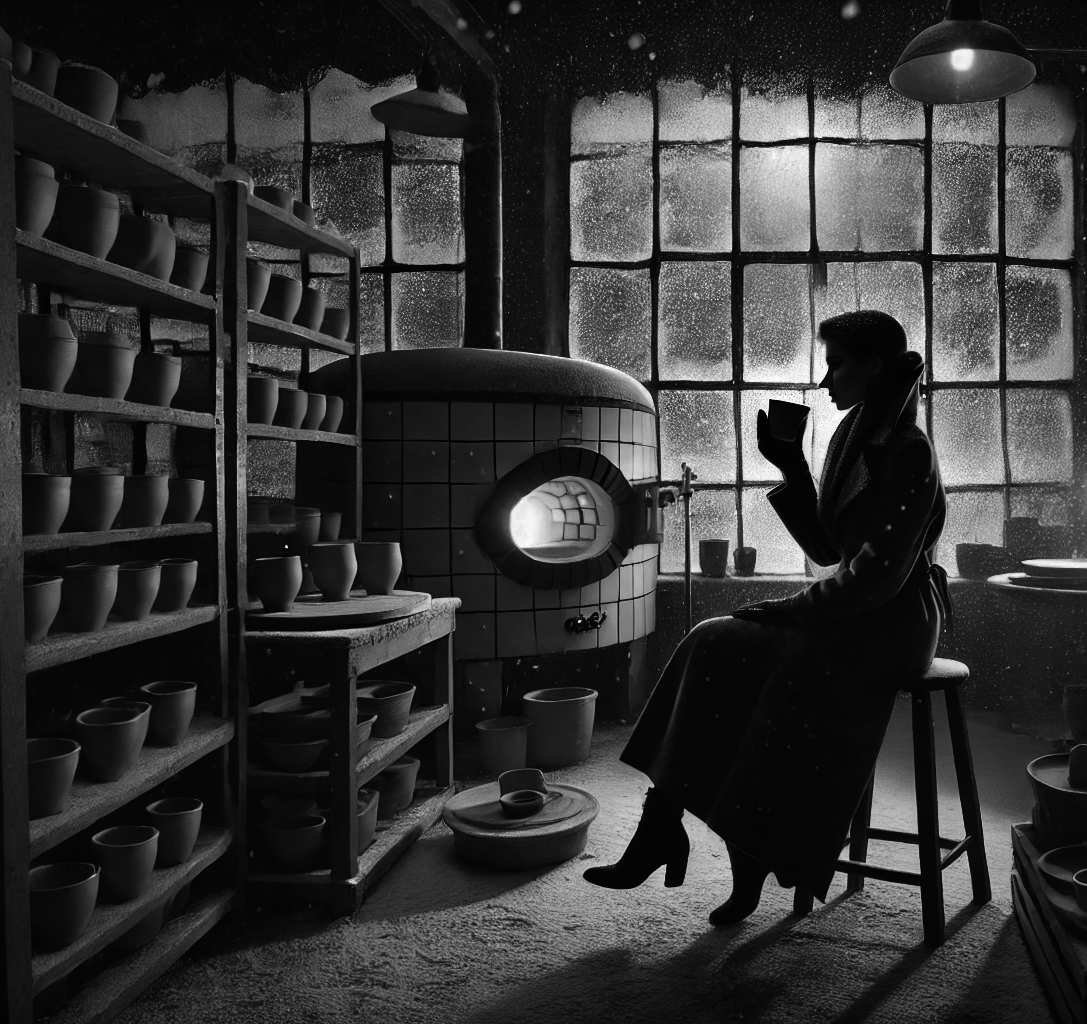
The pottery studio was quiet that night, save for the steady hum of the kiln in the corner, like a heartbeat keeping time in the dark. Outside, the city was gripped by winter’s icy hand. Gusty wind howled through the streets, carrying snow that fell steadily, cloaking everything in a cold, relentless blanket. I was nursing my third cup of coffee, its bitter edge sharper than the tools on my workbench, when I saw her silhouette through the smoked glass door.
Charlotte. The kind of woman who’d make a potter forget about the perfect cylinder they were throwing and end up with a lopsided bowl instead. She stood there for a moment, her figure framed by the diffuse glow of a streetlamp, before she rapped lightly on the door—the distinct way she always did when she needed something. As she stepped inside, brushing snowflakes from her coat. “Hot Toddy”? "Just the thing to warm you on a cold night." I offered. Taking the warmed tumbler from my hands, she noted the craftsmanship of the handmade ceramic. "Where is the lemon or honey” as she sipped? I replied with a shrug.
The pleasantries were over, she was trouble, no doubt about it, but her trouble came wrapped in a question. A single, loaded question.
“Ken,” she said, her voice as smooth as a porcelain slip, “why do potters call it ‘bisque’?”
I leaned back in my chair, as the window shuddered with the weight of the night’s mysteries. “Bisque,” I repeated, tasting the word like a potter kisses the rim of a well formed mug. “You’ve got yourself a question steeped in history, Charlotte. You’d better take a seat.”
She slid onto the stool across from me, her eyes scanning the studio like she was looking for clues. I could tell this wasn’t just idle curiosity. No, this question had been eating at her, a nagging itch she couldn’t scratch.
“Bisque firing,” I began, “is the first firing in the pottery process. It turns raw clay into ceramic, hard enough to handle but still porous enough to soak up glaze. It’s like the clay’s debut, its first step into the world of permanence. But the name ‘bisque’? That’s where the story gets interesting.”
Her gaze didn’t waver. She was the kind of audience who’d make a lecture on glaze chemistry feel like a Shakespearean monologue.
“The term comes from the French word ‘biscuit,’” I continued, “which means ‘twice-cooked.’ Back in the old days, potters would often fire their work twice: once to make it sturdy, and again after glazing. The first firing was like baking the clay into a ‘biscuit.’ Soft in the middle, rough around the edges, but ready for its finishing touch.”
Charlotte’s lips curved into a half-smile. “So it’s a culinary term?”
“You could say that,” I replied. “But there’s more to it. In French kitchens, a ‘biscuit’ was a twice-baked treat. In pottery, it’s a metaphor. The clay isn’t just raw anymore. It’s started its transformation. It’s still got potential, but it’s no longer soft, no longer something you can reshape. Bisque is the threshold between what was and what could be.”
She nodded, her fingers tracing the edge of her drink. “So, it’s about change.”
“Exactly,” I said, leaning forward. “Bisque firing is a commitment. Once that clay goes into the kiln and reaches those high temperatures, there’s no going back. It’s a leap of faith. A declaration that this lump of earth is ready to be more.”
Charlotte’s eyes softened, the mystery of the word ‘bisque’ settling into her like glaze into the grooves of a pot. “It’s poetic,” she murmured.
“Pottery tends to be,” I said, smiling despite myself. “Every step of the process carries its own weight, its own meaning. Bisque is just the start, but it’s a start that matters.”
She stood then, smoothing her coat as she prepared to leave. “Thanks, Ken. I guess I just needed to hear it from someone who understands.”
“Anytime, Charlotte,” I said, watching her walk out into the night. The door swung shut, leaving me alone with the hum of the kiln and the lingering scent of her perfume.
Bisque. A word as simple as clay and as complex as the process it described. Just like Charlotte, it had layers. And just like pottery, it left you wondering what it might become next.
"The Potter's Dictionary of Materials and Techniques" by Frank and Janet Hamer
"The Complete Guide to Mid-Range Glazes" by John Britt
#PotteryLife #BisqueFiring #CeramicsStory #ClayAndKiln #Craftsmanship #PotteryAndProcess #HandmadeCeramics #PotteryStudio #PotteryClass #DateNight
Ceramics and the Cycle of Life: Exploring Pottery in Death Rituals
Throughout history, ceramics have served as more than vessels for food or drink; they have been silent witnesses to humanity’s most profound transitions, including death. From the intricately painted Greek lekythoi to the guardian haniwa figures of Japan, pottery has played a vital role in rituals honoring the dead. These crafted forms tell stories of belief, culture, and the enduring connection between the living and the departed.
In this exploration, we delve into how different civilizations used ceramics to preserve memories, protect souls, and guide the dead to the afterlife. Whether safeguarding organs in Egyptian tombs or offering spiritual sustenance in Mesoamerican burials, these objects reveal the universal human desire to find meaning in mortality. Join us as we uncover the role of pottery in the rituals that bridge life and death.
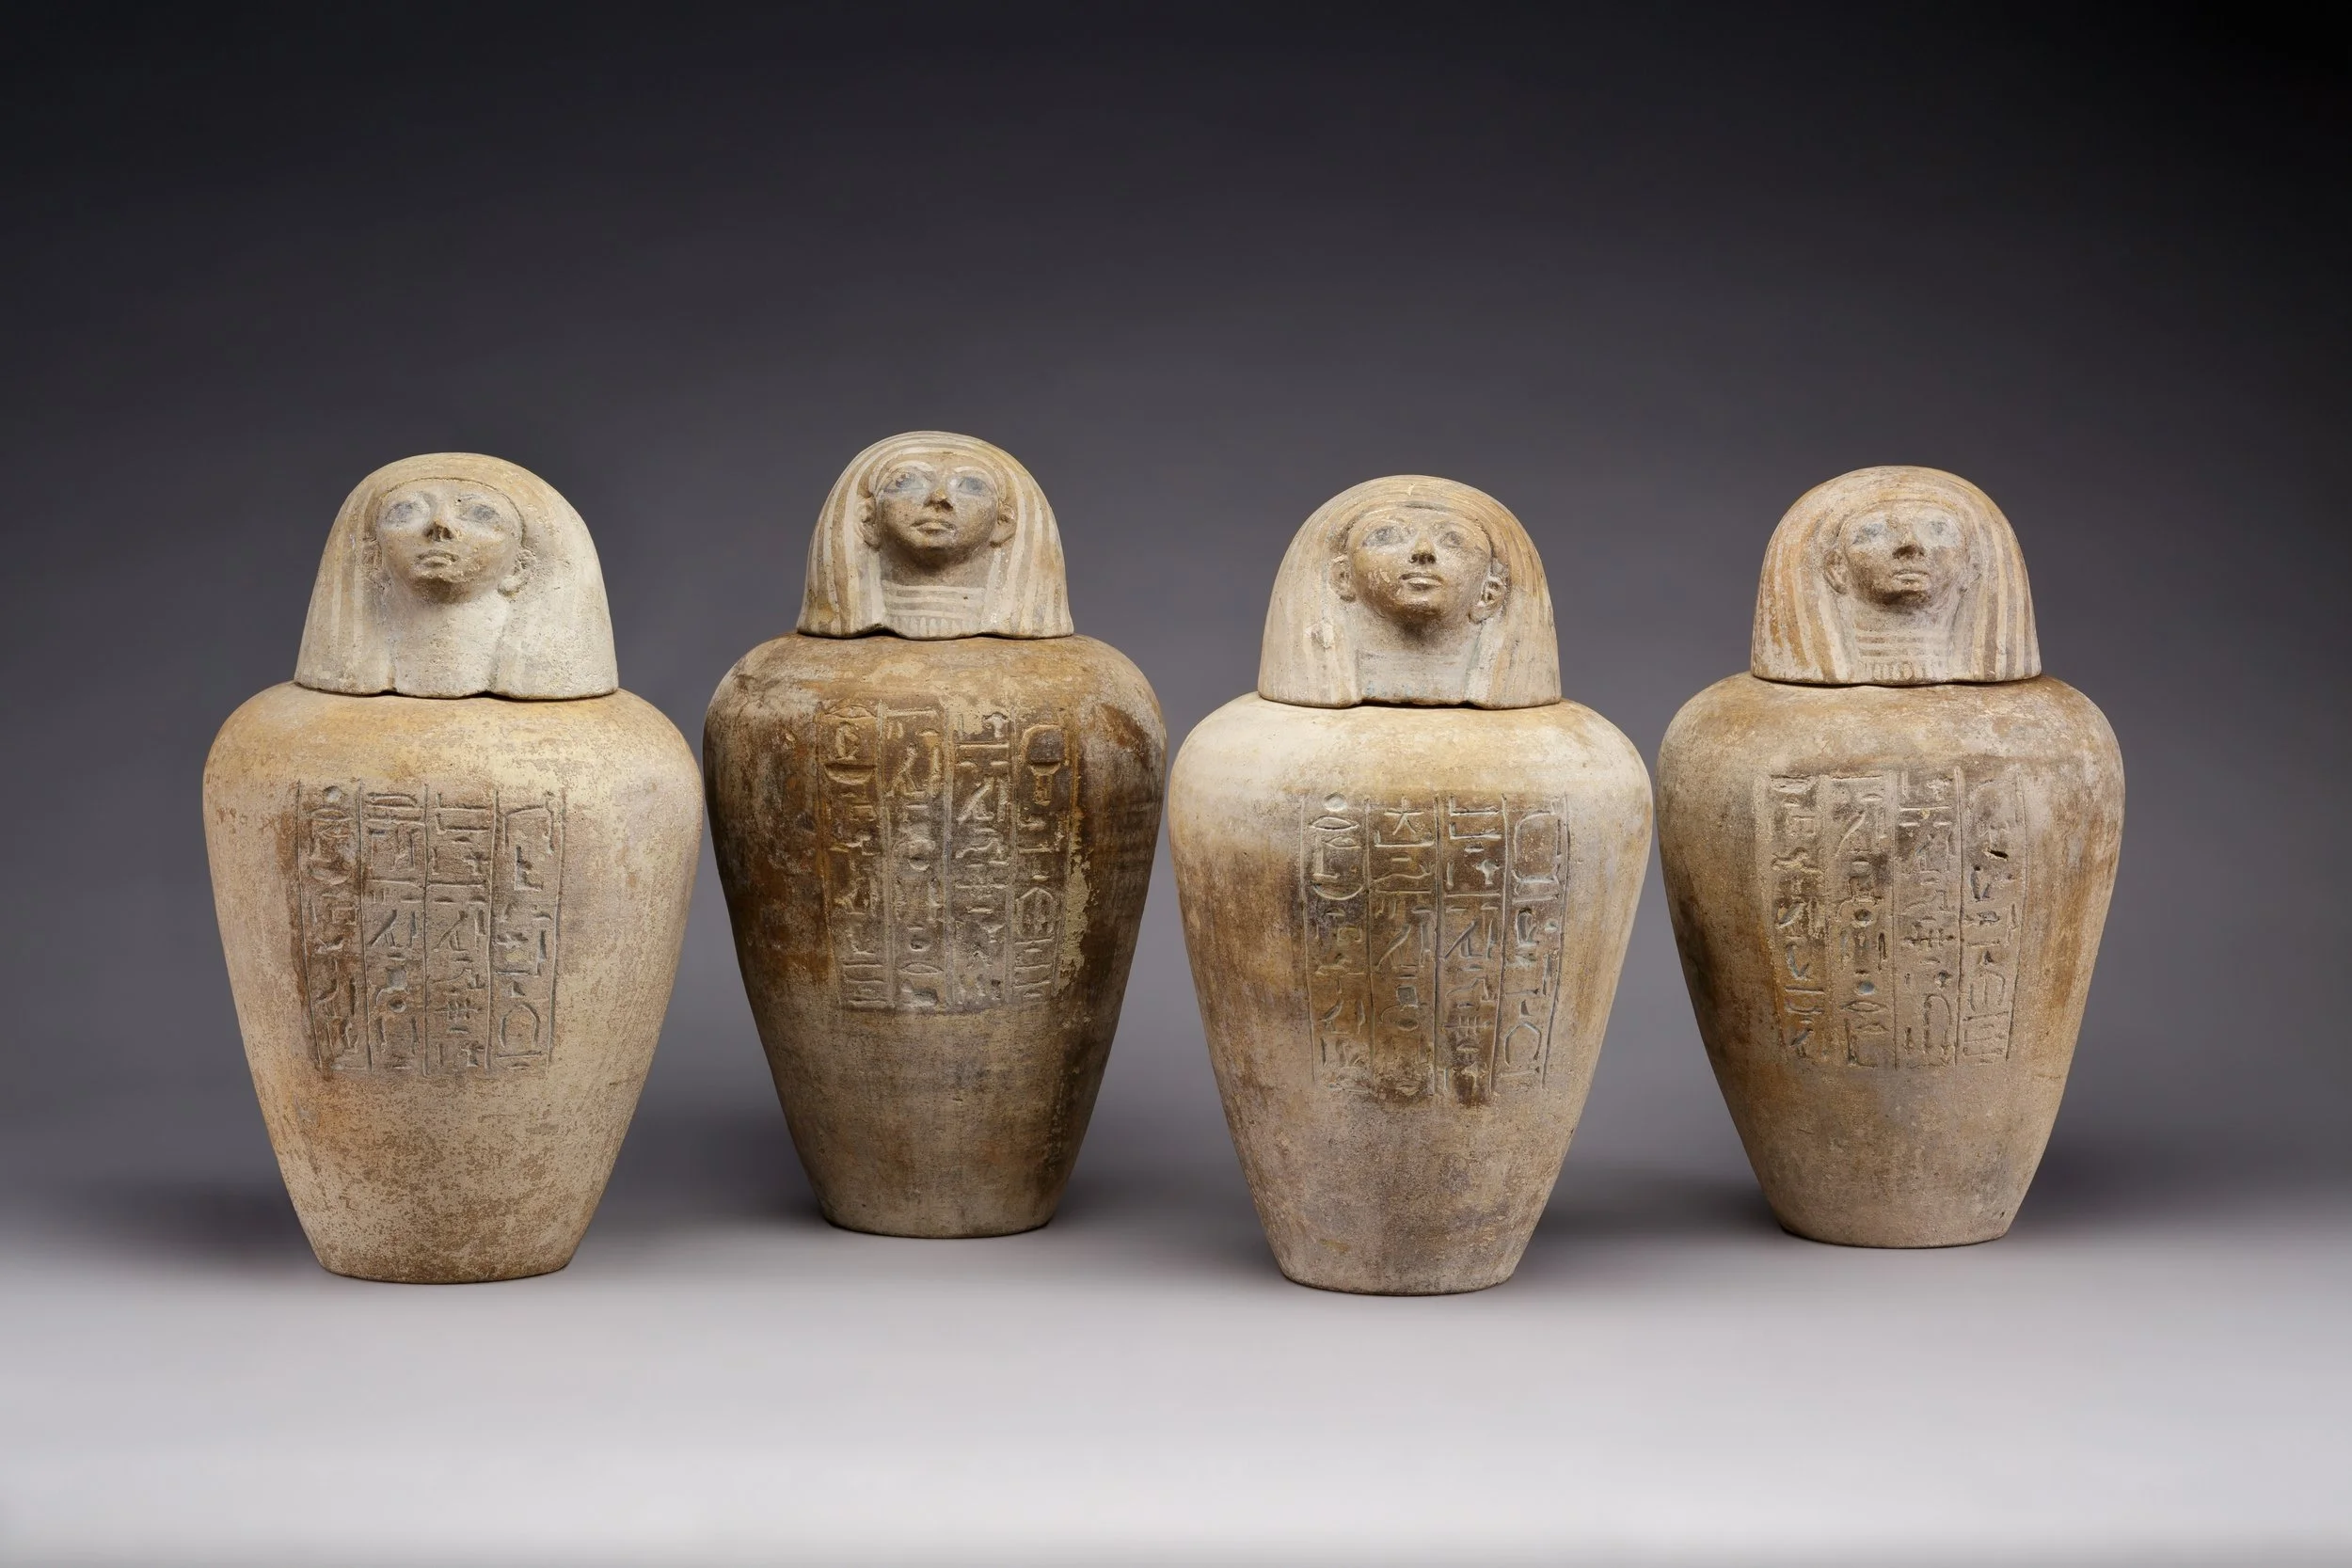
1. Egyptian Canopic Jars
In ancient Egyptian funerary practices, canopic jars were essential for preserving the internal organs of the deceased during mummification. Each jar was associated with a protective deity from the four sons of Horus: Imsety (human-headed) for the liver, Hapy (baboon-headed) for the lungs, Duamutef (jackal-headed) for the stomach, and Qebehsenuef (falcon-headed) for the intestines. These jars were typically made from pottery or stone and placed near the mummy within the tomb. Their function was to safeguard the organs in preparation for the afterlife, as Egyptians believed the body had to be whole to ensure eternal life.
2. Greek Funerary Vases (Lekythoi)
In ancient Greece, lekythoi were used in funerary rites to carry oils and perfumes. These slender, elongated ceramic vessels often featured the white-ground painting technique, depicting scenes of mourning, parting, or underworld mythology. The oils were poured over graves as offerings to honor the deceased. Lekythoi were specifically associated with burials and were sometimes left as grave markers or offerings within tombs.
3. Mesoamerican Burial Vessels
Mesoamerican civilizations, such as the Maya and Aztecs, used ceramic vessels as an integral part of their burial customs. These vessels were often effigies, representing deities, ancestors, or symbolic imagery. They were used to store cremated remains or as containers for offerings, including food and goods for the journey to the afterlife. Maya burial urns, for instance, frequently depicted skeletal motifs or ancestral figures to emphasize the connection between the living and the dead.
4. Etruscan Ash Urns
The Etruscans of ancient Italy practiced cremation and used ceramic or stone ash urns to store the remains. These urns often resembled small sarcophagi, with lids sculpted to depict the deceased reclining at a banquet. This imagery symbolized the belief that the afterlife was a continuation of earthly pleasures, particularly feasting. Decorative motifs included mythological scenes, which were believed to guide or protect the deceased on their journey to the underworld.
5. Chinese Mingqi ("Spirit Objects")
During the Han Dynasty in China, mingqi, or “spirit objects,” were buried with the deceased to provide for their needs in the afterlife. These ceramic items included figurines of servants, animals, and replicas of household items such as granaries and stoves. The practice reflected a belief in an afterlife that mirrored the physical world, where the deceased would require the same resources and companionship as in life.
6. Japanese Haniwa Figures
In Japan’s Kofun period, haniwa were clay figures placed on or around burial mounds. These unglazed ceramics depicted warriors, animals, or architectural models and served both practical and symbolic purposes. They delineated the burial site and were thought to protect the deceased by creating a spiritual boundary. Haniwa also reflected the social status and role of the deceased.
7. Pre-Columbian Effigy Vessels
In the Andes, pre-Columbian cultures like the Moche created effigy vessels that were central to death rituals. These ceramics often featured human figures, animals, or deities and were highly detailed. They were placed in graves as companions or offerings to the dead, reflecting the individual’s status and the culture’s beliefs about the afterlife.
8. African Funerary Pots
In various African traditions, ceramic pots were used in funerary contexts to hold remains, offerings, or ritual materials. These pots were often decorated with patterns and symbols representing protection, the journey to the afterlife, or the cyclical nature of life and death. For instance, in West Africa, these vessels were integral to ceremonies that connected the deceased to their ancestors.
9. Roman Cinerary Urns
In ancient Rome, cremation was a common burial practice, and ceramic urns were used to store ashes. These urns were often decorated with reliefs of mythological scenes, floral patterns, or inscriptions identifying the deceased. They were placed in columbaria—structures with niches for multiple urns—or in family tombs. The designs reflected Roman beliefs about death and the afterlife, emphasizing memory and legacy.
10. Neolithic Ossuaries
During the Neolithic period, large ceramic jars or ossuaries were used to hold the bones of the deceased. These containers were often decorated with geometric patterns, symbols, or facial motifs, indicating their protective or ritual significance. Found in regions like the Levant, these ossuaries suggest early human practices of ancestor worship and a belief in the spiritual connection between the living and the dead.
The Artistic Elements of Design:
Expressing Creativity Through Clay
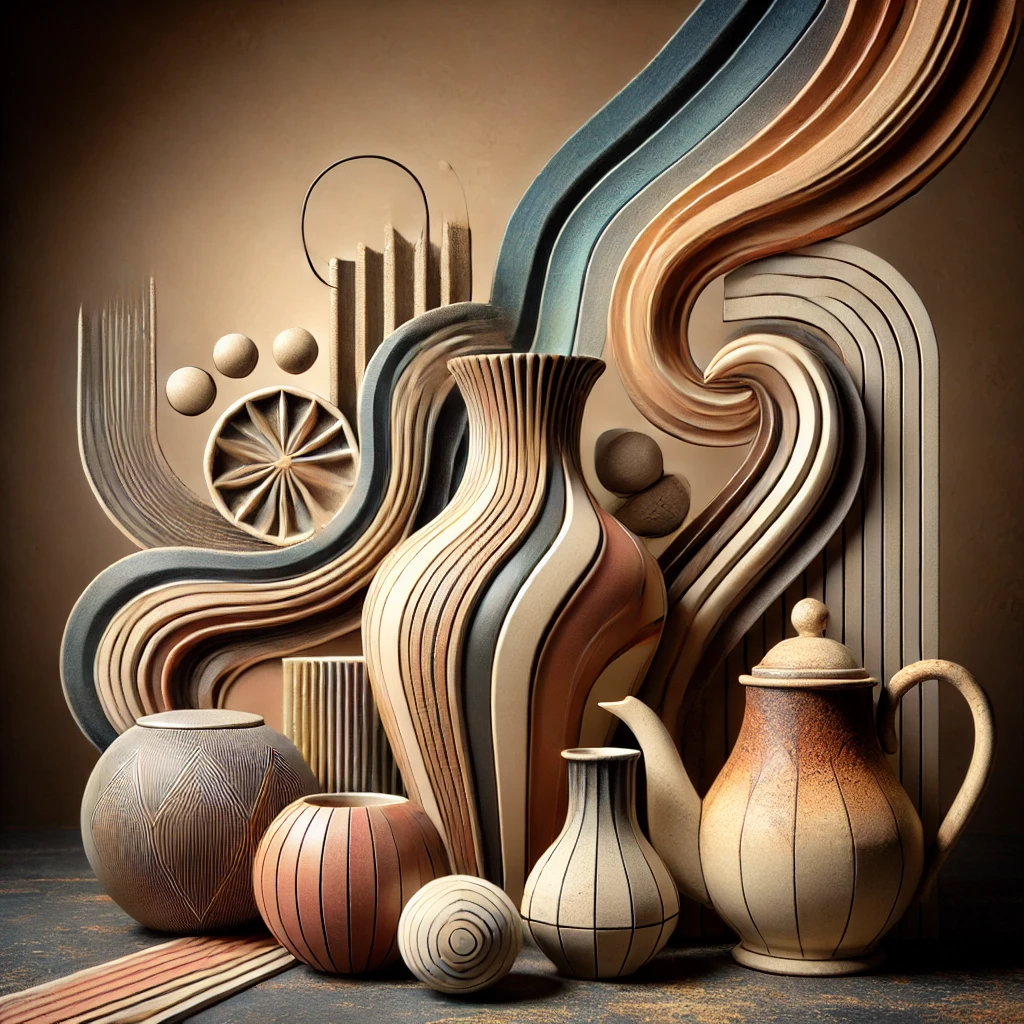
Pottery and ceramics are timeless art forms that beautifully marry functionality with artistic expression. When working with clay, artists have the opportunity to bring to life the fundamental elements of design: line, shape, form, color, texture, space, and value. Each element contributes to the overall aesthetic and emotional impact of a piece, allowing both the artist and the viewer to connect deeply with the work.
Line: The Foundation of Expression
Lines guide the viewer’s eye and create movement within a piece. In pottery, lines may take the form of a pot’s silhouette, intricate carvings, or painted designs. Whether bold and geometric or soft and flowing, lines set the tone for a piece, communicating energy and intent. The fluid curves of a vase can evoke grace and elegance, while angular lines in a geometric design might suggest precision and modernity. Example: The works of Lucie Rie often feature delicate, incised lines and subtle banding, emphasizing elegance and simplicity.
Shape and Form: Defining Dimensions
Shape refers to the two-dimensional aspect, while form brings the third dimension into play. Potters transform flat slabs or malleable lumps of clay into dynamic forms that can be both functional and sculptural. A simple cylindrical mug might celebrate symmetry and practicality, while an asymmetrical sculpture explores organic, free-flowing shapes. Shape and form interact to create not only utility but also visual intrigue. Example: The sculptural forms of Hans Coper showcase innovative shapes that blend function and abstraction.
Color: A Palette of Emotions
The colors in ceramics emerge through glazes, underglazes, and natural finishes. Earthy tones evoke warmth and tradition, while bold, vibrant hues can challenge convention and create excitement. The chemistry of glazing—involving minerals, heat, and timing—adds an element of alchemy, turning raw clay into a vivid masterpiece. This unpredictability makes each piece one of a kind, amplifying its emotional resonance. Example: The vibrant, layered glazes of Jun Kaneko highlight the emotional power of color in large-scale ceramic works.
Texture: The Touch of Clay
Texture invites interaction, whether it’s the smooth surface of a porcelain vase or the rough, tactile feel of a hand-built stoneware pot. Techniques like sgraffito, impressing, or slip trailing enrich a piece’s surface, providing both visual and tactile appeal. The act of creating texture can also be meditative for the artist, as they imprint patterns, grooves, or marks into the clay, leaving a personal touch on every piece. Example: Magdalene Odundo’s burnished surfaces demonstrate the power of texture through polished elegance.
Space: Balancing Negative and Positive
The relationship between positive (occupied) and negative (empty) space shapes the harmony of a ceramic work. A well-designed piece uses space thoughtfully, whether it’s the open void of a bowl’s interior or the interplay of pierced patterns in a lantern. This balance of space can influence how light interacts with the piece, creating shadows and highlights that enhance its aesthetic appeal. Example: The perforated vessels of Alev Ebüzziya Siesbye illustrate the delicate balance between form and empty space.
Value: Depth and Contrast
Value, or the lightness and darkness of a design, brings depth and contrast. In pottery, value is often explored through glaze effects, such as gradients or layering, which add complexity and intrigue to a piece. The interplay of light and shadow on a textured surface or a matte glaze can evoke a sense of depth and mystery, drawing the viewer in. Example: Bernard Leach’s use of tonal contrasts in his stoneware pots showcases how value can create depth and dimension.
The Medium of Clay: A Canvas for Artistic Exploration
Clay offers infinite possibilities for self-expression. Its pliability allows artists to experiment freely, while its permanence—once fired—captures those creative moments for eternity. By combining technical skills with personal vision, potters create pieces that tell stories, evoke emotions, and inspire awe.
Conclusion
Exploring the artistic elements of design through pottery and ceramics transforms a simple lump of clay into a meaningful work of art. Whether you’re a seasoned potter or a curious beginner, understanding these elements can deepen your appreciation for the craft and inspire your own creative journey.
Was our pugmill a good idea?
So we got a pugmill.
For over eight months, we were on the hunt for a used pugmill for our studio. With our students going through 500 to 1,000 pounds of clay each month, the pile of recycled clay was turning into a real headache. Over time, the clay was losing its plasticity, and wedging it all by hand just wasn’t cutting it anymore. A pugmill seemed like the perfect solution—a machine to reclaim clay, make it workable again, and save us from wearing out our arms.
Finding a good used one however, was not easy.
Why We Needed a Pugmill
If you’ve never used one, pugmills are basically magic for potters. They take scraps of clay—too dry, too wet, whatever—and mix it into smooth, consistent clay. A de-airing pugmill is even better because it removes air bubbles, so the clay’s ready to go straight to the wheel or slab roller. With the amount of clay we go through, having a pugmill wasn’t just about convenience; it was about keeping our process sustainable and saving time.
The downside? New pugmills are expensive—like, really expensive. So, buying used felt like the way to go. Turns out, that’s easier said than done.
The Search: A Test of Patience
We dove into the search with high hopes, checking pottery forums, classified ads, and auction sites every day. Facebook Marketplace and Craigslist became part of our daily routine. Occasionally, we’d find a listing that looked promising, but either it was already sold or it was hundreds of miles away.
We also leaned on our network of potter friends, studio owners, and suppliers. We told everyone we knew that we were looking for a pugmill. A few leads popped up here and there, but most didn’t pan out. We quickly realized why used pugmills are so hard to find—once a studio gets one, they rarely let it go.
Challenges Along the Way
It wasn’t just about finding one; it was also about finding the right one. Some pugmills we saw were in rough shape—motors that didn’t work, missing parts, or just years of wear and tear from heavy use. Repairing one could end up costing as much as buying new, so we had to be picky.
Timing was another challenge. The good deals were snapped up almost immediately. We had to stay on top of listings and be ready to move fast.
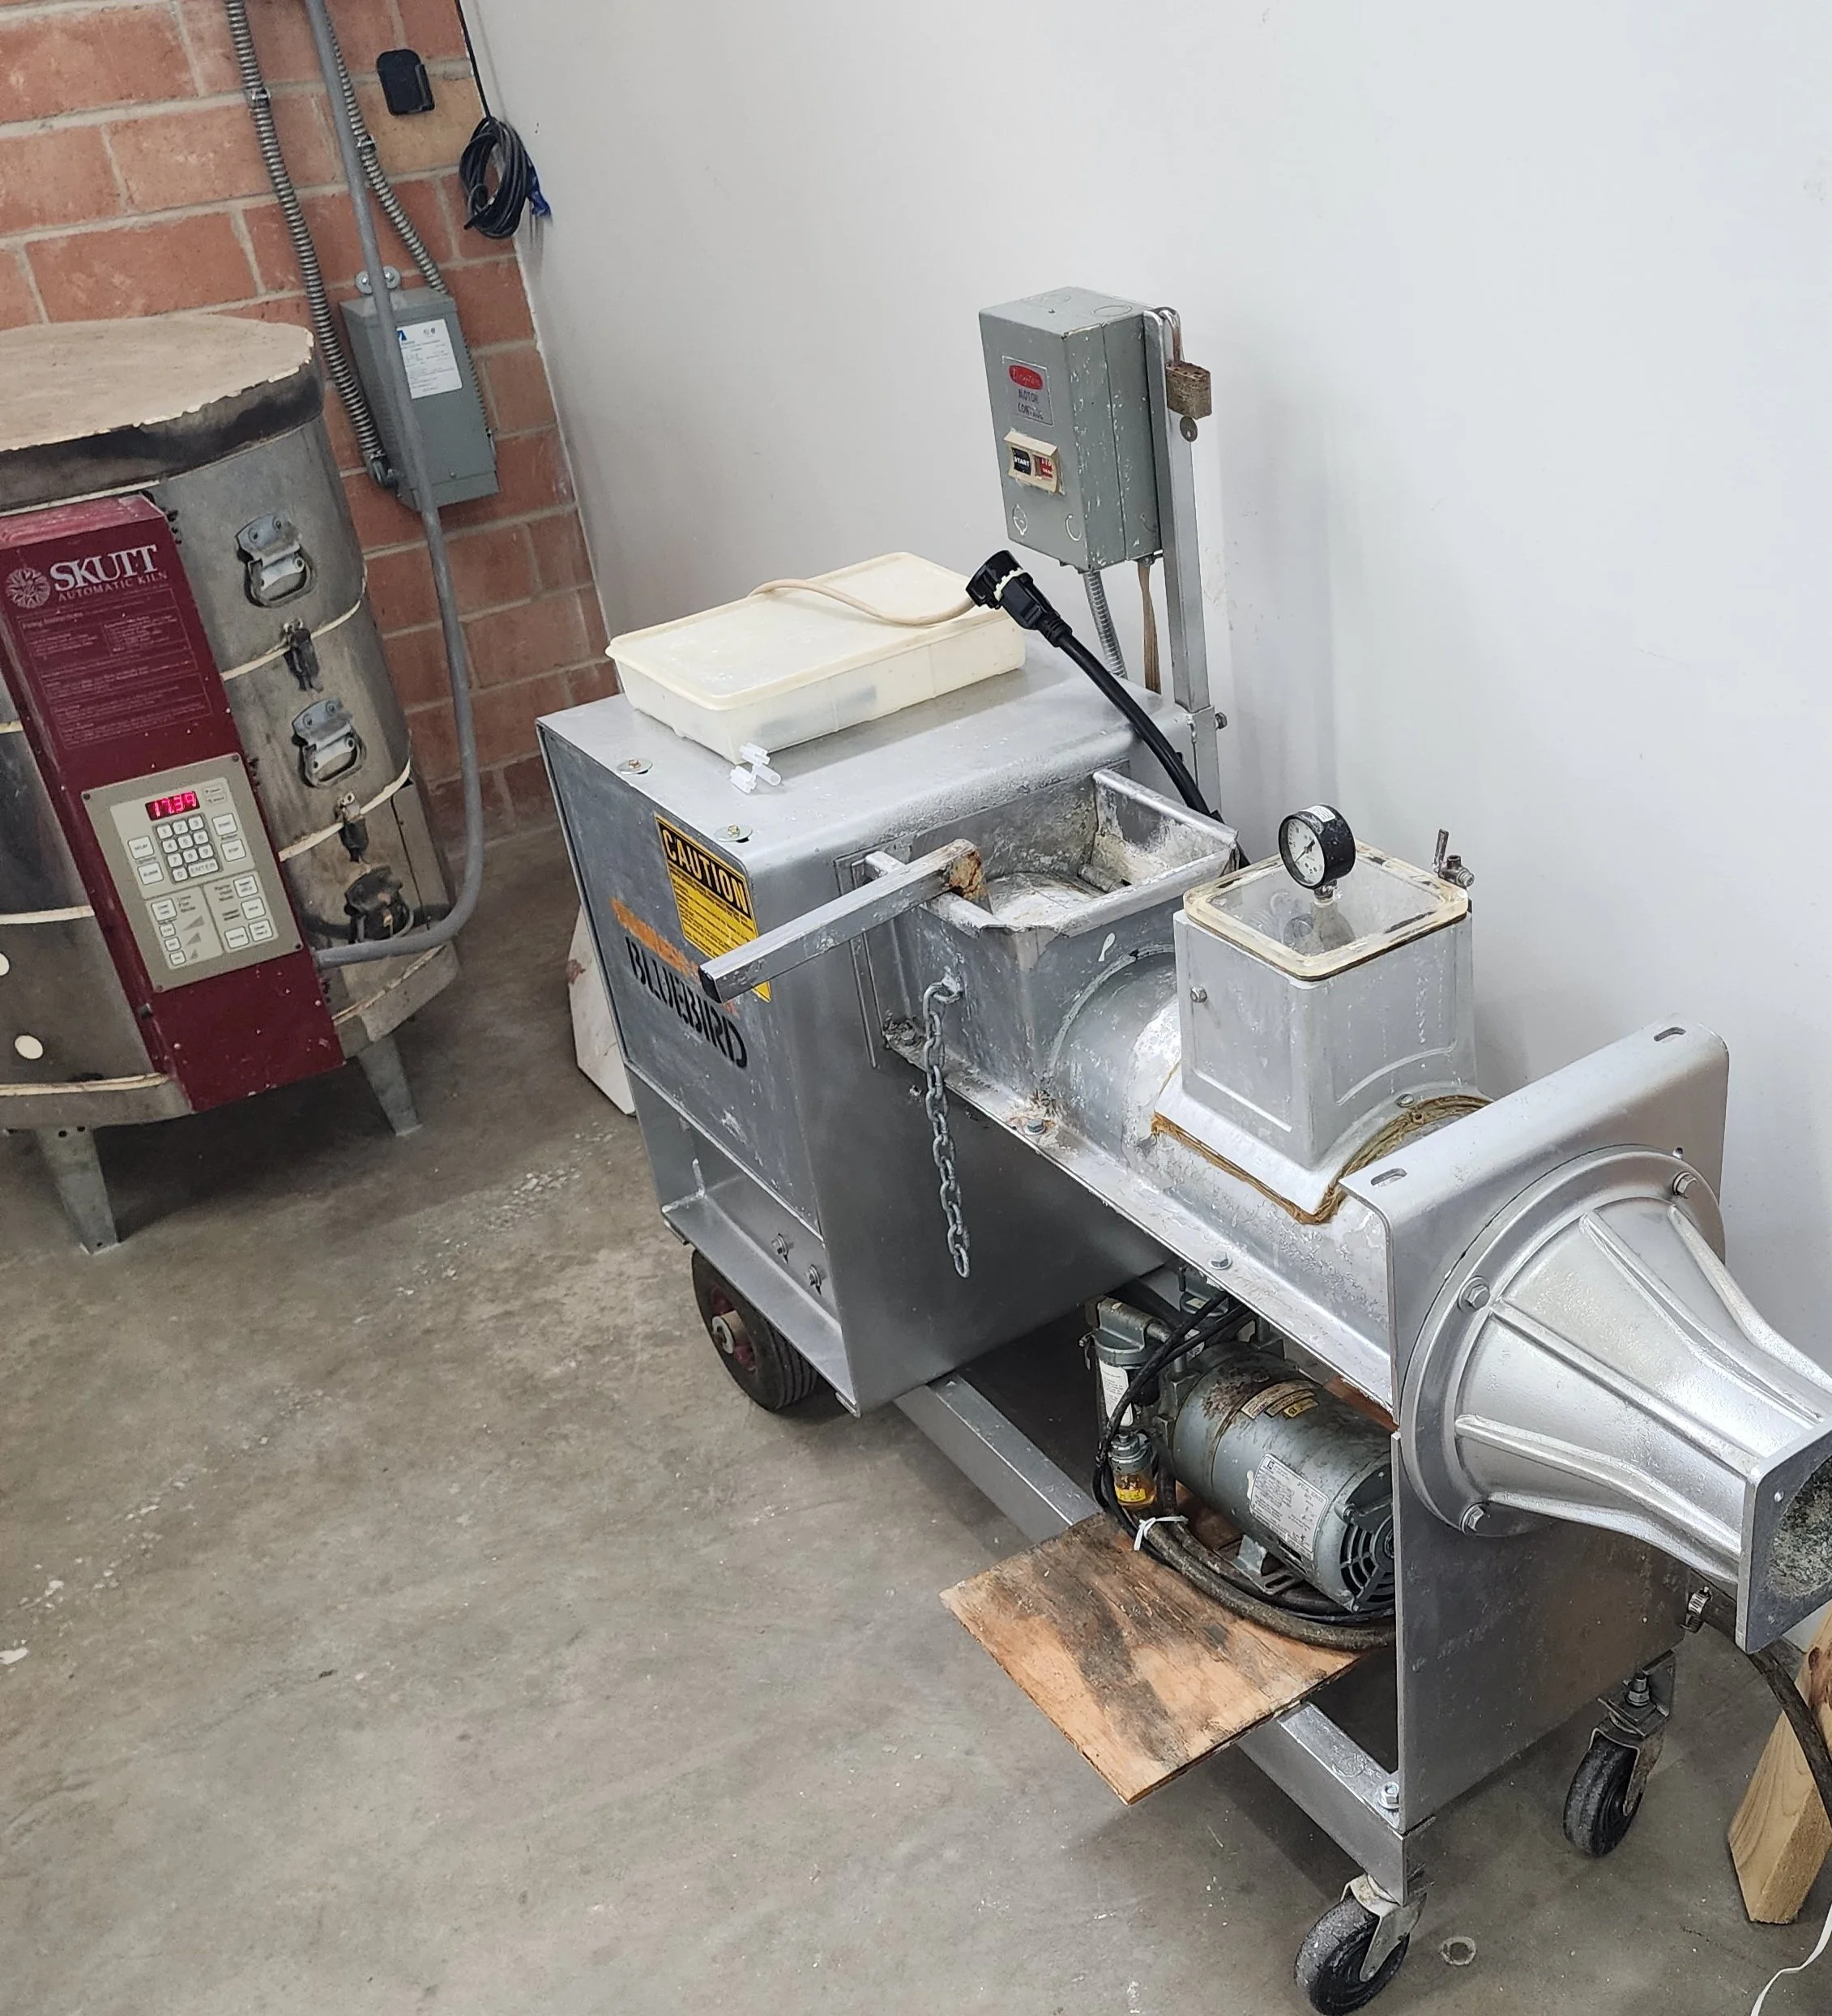
Don’t forget about the scams.. We found this to be true for buying used pottery wheels as well. We find that asking questions that the seller would need to have personal knowledge of helps. We also ask for additional photos of parts not shown. For example the plug. In our case this was perfect for us as it was a 240v machine and we needed to verify the plug type. If the seller asks for a deposit move on.
The Big Find
Finally, after months of searching, we hit the jackpot. A lightly used pugmill showed up on a regional pottery group’s classifieds page. It belonged to a small studio that was downsizing, and best of all, it was close enough to drive to—no expensive shipping required.
When we went to check it out, it was in great shape. The motor ran smoothly, the barrel was clean, and the auger had barely any wear. After a quick negotiation, we loaded it up and brought it home. It felt like we’d struck gold.
Life with the Pugmill
Since adding the pugmill to our studio, everything’s changed for the better. Recycling clay is quick and easy now, and we’ve cut down on waste. The clay it produces is smooth, consistent, and ready to use. (we age ours for weeks before use)
But was it worth it? Short answer, yes*.
* We like our pugmill, we do… even used it was really expensive. It takes up quite a bit of space. It is pretty loud. There is still prep work to be done to prepare the clay. (drying, slaking, rehydrating to consistency) But we can process a few hundred pounds of clay in about an hour. We run it through the machine until we are happy with the consistency (firmness/wetness). We bag the processed clay and let it marinate in its own juices until we need it.
What Are Mason Stains? A Quick Guide for Pottery People
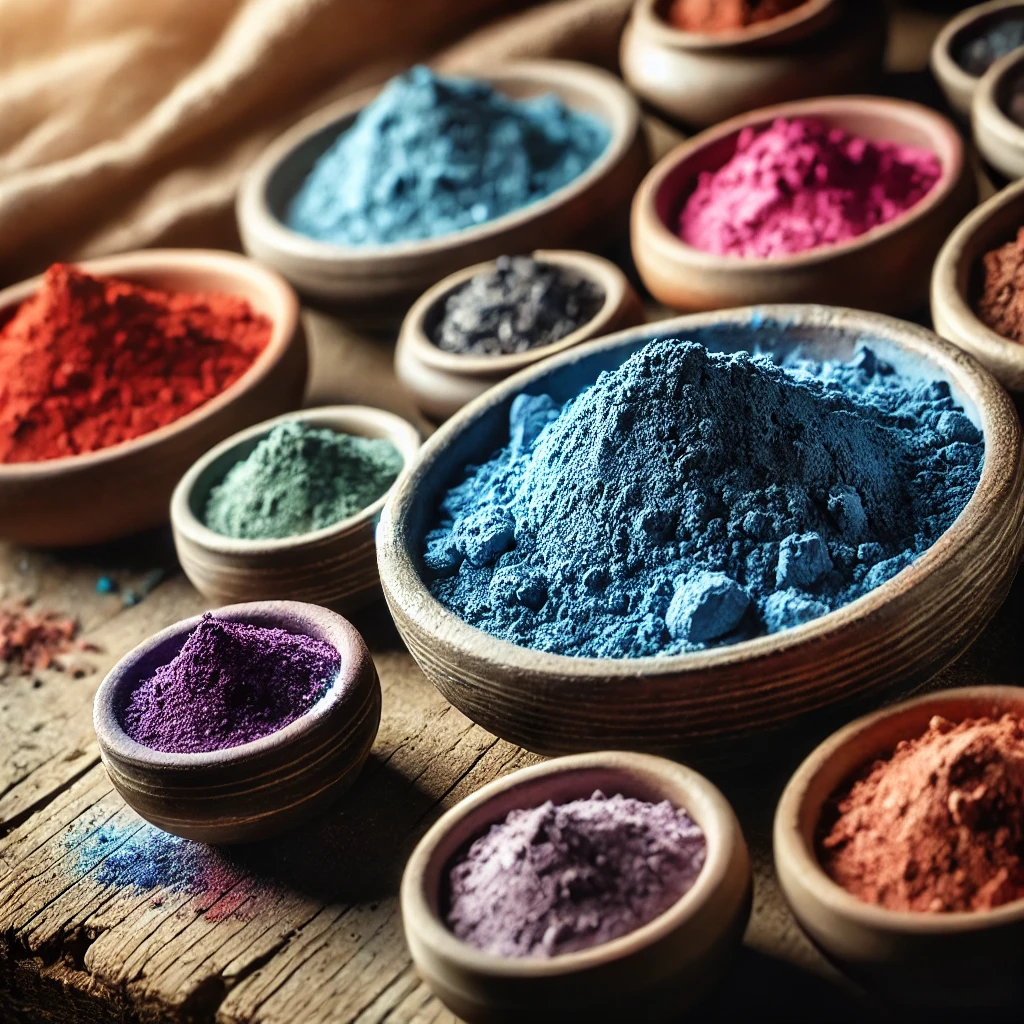
Here's an image of various ceramic pigments in powdered form, showing a range of vibrant colors. This should give a great visual representation of mason stains and their versatility!
Hey there! I got a great question from one of my students recently, and I thought it would be perfect to share the answer here. The question was: "What exactly are mason stains, and how do we use them in ceramics?"
So, let's break it down!
What Are Mason Stains?
Mason stains are specialized ceramic pigments used to color glazes, slips, or even the clay itself. Think of them as a mix of finely ground minerals and oxides (like cobalt, chromium, iron, or manganese) that are specifically designed to give consistent and vibrant colors when fired. Unlike natural oxides, which can be unpredictable, mason stains provide a reliable and stable way to achieve a wide range of colors—from soft pastels to bold, vivid hues.
How Are Mason Stains Made?
Mason stains are made by combining metal oxides with other elements and then calcining (heating) the mixture at high temperatures to stabilize the pigments. This process locks in the color, allowing it to stay consistent during firing. Once the stains are made, they are ground into a fine powder that’s easy to mix with other ceramic materials.
How Can You Use Mason Stains?
There are several ways you can incorporate mason stains into your work:
Coloring Slip or Clay: Add mason stains directly to your slip or clay body to create custom colors. This is ideal if you want your piece to have a consistent color throughout or if you're planning on using techniques like marbling.
Tinting Glazes: By mixing mason stains into a clear or white base glaze, you can develop your own unique palette. This is perfect for achieving more control over the surface color of your pottery.
Painting and Decoration: Mix mason stains with water or a glaze medium to create a paint-like consistency that can be brushed directly onto bisque ware or greenware. This is fantastic for underglaze decoration or more intricate designs.
Combining Techniques: Experiment with layering mason stains over or under other decorative methods, such as sgraffito or inlay, for a unique look.
Why Should You Use Mason Stains?
Mason stains are super versatile, allowing you to explore and expand your creativity. They offer consistent results across different firing temperatures and are compatible with many types of clays and glazes. They’re a great way to introduce color to your pottery without worrying about unpredictable outcomes.
So, to my student who asked, “What are mason stains?”—I hope this answers your question! And to anyone else reading, I encourage you to get some mason stains and start experimenting in your studio!

Pottery and Ceramics: What’s the Difference?
The rain was coming down in sheets, the kind of downpour that turns the city into a blurry, noirish painting of shadow and light. I was in my studio, the only place that felt like home on nights like this. The smell of wet clay mixed with the sharp scent of coffee as I stared at the half-finished vase on my wheel, wondering how I got tangled up in this mess in the first place.
That’s when she walked in—Charlotte. She was all legs and trouble, with eyes like two dark secrets and a voice that could melt fired porcelain . She had that look about her, the kind that tells you she’s about to ask questions you’re not ready to answer.
“Blue Dog,” she said, her tone as smooth as a well-thrown pot, “I need your help. What’s the difference between pottery and ceramics?”
I leaned back in my chair, giving her the once-over. It wasn’t the first time someone had asked me that, but coming from Charlotte, it felt like there was more to the question. She wasn’t just curious—she was desperate for answers.
I lit a cigarette, the smoke curling up into the dim light like a promise of things left unsaid. “Pottery and ceramics, huh? That’s like asking the difference between a crook and a killer—they’re both bad news, but one’s got a bit more finesse.”
Her eyes narrowed, the way they do when she’s trying to figure out if I’m playing her. I wasn’t, not this time. “Pottery,” I said, flicking ash into an old clay cup, “is the down-and-dirty work. It’s clay in your hands, spinning on the wheel, a little bit rough around the edges. Pottery’s got soul. It’s the kind of thing that’s been around forever, long before anyone thought to give it a fancy name.”
She nodded, but I could tell she was waiting for the other shoe to drop. “And ceramics?” she asked, her voice almost a whisper.
“Ceramics,” I said, leaning forward, “is the slick operator of the clay world. It’s a little more polished, a little more refined. You take that same clay, but you fire it hotter, you give it a glaze that shines like sin, and suddenly, you’ve got something that’s not just functional—it’s art. Ceramics can be anything—porcelain, stoneware, even something abstract that doesn’t know whether it’s a vase or a sculpture.”
Charlotte took a step closer, the sound of her heels on the concrete floor echoing like a gunshot in the stillness. “So, ceramics are the high-class dame, and pottery’s the working stiff?”
I couldn’t help but smile at that. “You could say that. But here’s the kicker—they’re not so different underneath it all. Pottery is ceramics, and ceramics is pottery. The real difference? It’s all in the heat, the pressure, and the way they come out the other side.”
She looked at me like she was trying to read my mind, to figure out if I was holding something back. And maybe I was. “You see,” I continued, “pottery’s about the process, about getting your hands dirty and making something that’s solid, dependable. Ceramics? That’s about the transformation, about taking something simple and turning it into something that can stand on its own as a piece of art.”
For a moment, she didn’t say anything. Just stood there, letting it sink in. Then she flashed a smile that could light up a rainy night. “Thanks, Ken,” she said. “I think I get it now.”
She turned to leave, her silhouette cutting through the gloom, but I stopped her with a word. “Charlotte.”
She paused, looking back over her shoulder.
“Be careful,” I said. “In this line of work, it’s easy to get caught up in the glitz and forget where you started. Pottery or ceramics, it’s all just clay at the end of the day.”
She gave me a nod, a silent promise that she understood. Then she was gone, lost in the night, leaving me alone with my thoughts and that half-finished vase. I took another drag of my cigarette and turned back to my wheel, the clay spinning under my hands, rough and unpolished. Just the way I liked it.
In the end, it didn’t matter whether you called it pottery or ceramics. What mattered was the story behind it, the hands that shaped it, and the heat it took to make it something more. And that, my friend, was a mystery worth solving.
The Science Behind Pottery Kilns: My Journey with Fire and Clay
Pottery has always fascinated me. There’s something almost magical about transforming soft, malleable clay into sturdy, beautiful ceramics. Central to this transformation is the kiln, the heart of the pottery process. Let me take you on a journey through my experiences and discoveries with kilns, as I delve into the science and art behind these essential tools.
My First Encounter with a Kiln
I still remember the first time I loaded a kiln. The air was thick with anticipation and the faint, earthy smell of wet clay. I carefully placed my greenware—unfired clay pieces—inside, making sure they didn't touch each other. This step was crucial to prevent them from fusing together during the firing process. Little did I know, this was just the beginning of my journey into the intricate world of pottery kilns.
The Bisque Firing: A Rite of Passage
The initial firing, known as bisque firing, was a revelation. As the kiln heated up to temperatures between 800°C to 1000°C (1472°F to 1832°F), I could almost feel the physical water evaporating from the clay. This stage hardened the pieces into a porous state called bisque. Watching the transformation was like witnessing a rite of passage for my creations. The organic materials burned out, and the clay particles started to sinter, partially fusing together.
The Alchemy of Glazing
After the bisque firing, I applied glaze to the bisqued pieces. This step always felt like alchemy. Glazes are made from a mixture of silica, fluxes, and metallic oxides. When these compounds melt and bond during the final firing, they form a glassy coating that can add color, texture, and waterproofing to the pottery. The glaze firing, which happens at higher temperatures—typically between 1200°C to 1300°C (2192°F to 2372°F)—was where the real magic happened. The clay vitrified, turning into a non-porous, glassy state, and the glaze melted into a smooth, often glossy finish.
The Science Behind the Transformation
As I became more experienced, I delved deeper into the science behind these transformations. The process begins with dehydration. As the kiln heats, physically bound water in the clay evaporates, starting around 100°C (212°F) and continuing up to 300°C (572°F). Next, organic materials within the clay burn off between 300°C and 900°C (572°F to 1652°F), strengthening the clay body. The quartz inversion at around 573°C (1063°F) was a critical point I had to monitor carefully to avoid cracking.
The final stages involve sintering and vitrification. Between 900°C and 1300°C (1652°F to 2372°F), the clay particles fuse together, creating a solid structure. The silica in the clay melts, filling any pores and creating a glassy, non-porous matrix. Each firing was a delicate balance of timing, temperature, and chemistry.
Exploring Different Kiln Types
Over time, I experimented with different kiln types. Electric kilns, common in studios and schools, offered precise temperature control and consistent results. They used resistance coils to generate heat, and their simplicity made them perfect for beginners. However, gas kilns, which use natural gas or propane, became my preferred choice for high-temperature firings. These kilns allowed me to control the kiln’s atmosphere—oxidizing or reducing—which significantly influenced the glaze's final appearance.
I also tried my hand at wood-fired kilns. These traditional, labor-intensive kilns required constant attention and skill but rewarded me with unique effects due to the variable atmosphere and ash deposits. Each firing was an adventure, producing distinctive results that reflected the interplay between fire, clay, and my craftsmanship.
The Dance of Kiln Atmospheres
One of the most fascinating aspects of kiln firing is the atmosphere inside the kiln. In an oxidizing atmosphere, plenty of oxygen is available, resulting in bright and consistent glaze colors. This atmosphere is typical in electric kilns and can be achieved in gas kilns by adjusting the air-to-fuel ratio. On the other hand, a reducing atmosphere, with limited oxygen, leads to unique glaze effects characterized by earthy, varied hues. This atmosphere is commonly achieved in gas and wood kilns by reducing the air supply, encouraging carbon monoxide production, which reacts with metal oxides in the glaze.
The Endless Journey
Each firing taught me something new about the delicate balance between material properties and artistic vision. Understanding the science behind pottery kilns deepened my appreciation for this ancient craft. The kiln is more than just a tool; it's a partner in creation, blending art and science to bring my ceramic dreams to life. As I continue my journey with fire and clay, I am constantly reminded of the intricate dance that turns humble clay into timeless works of art.
Pottery and Chemistry: Exploring Clay Composition
Pottery, an ancient craft dating back millennia, has been fundamental to human civilization. From utilitarian cooking vessels to intricate art pieces, pottery exemplifies a fusion of artistic expression and scientific principles. At the heart of pottery is its primary material: clay. A deep understanding of the chemical composition and properties of clay is essential for potters and materials scientists alike, as it influences everything from workability to the mechanical properties of the fired piece. Let’s delve into the intricate chemistry that underpins the world of pottery.
The Basics of Clay
Clay is a naturally occurring material composed mainly of fine-grained minerals, typically derived from the weathering of silicate rocks. The primary constituents of clay include alumina (Al₂O₃), silica (SiO₂), and chemically bound water (H₂O). These components, along with various impurities and organic matter, endow clay with its unique properties. The specific type of clay used in pottery can significantly affect the characteristics and quality of the finished product.
Types of Clay
Kaolin (China Clay): Composed predominantly of kaolinite (Al₂Si₂O₅(OH)₄), kaolin is notable for its purity and high melting point. It is characterized by a low iron content, which contributes to its white color and makes it ideal for producing porcelain and fine china.
Ball Clay: Containing high levels of kaolinite along with other minerals like quartz (SiO₂) and mica, ball clay is highly plastic and workable. It is often used in blends to enhance the plasticity and workability of other clays.
Stoneware Clay: This type of clay is intermediate in plasticity and firing temperature. It typically contains a mix of kaolinite, illite, and other minerals that provide durability and strength, making it suitable for functional ware.
Earthenware Clay: Fired at lower temperatures (typically between 1000°C and 1150°C), earthenware is more porous and less durable than stoneware or porcelain. It is often used for decorative pieces and terracotta products.
The Chemistry Behind Clay
The composition of clay determines its behavior during various stages of pottery making, including shaping, drying, and firing. Here’s a closer look at the chemical aspects that influence these processes:
Plasticity and Workability
Plasticity, the ability of clay to be shaped and hold its form without cracking, is primarily influenced by the presence of water and the particle size of the clay minerals. Clay particles are typically less than 2 micrometers in diameter. Finer particles, such as those found in ball clay, increase plasticity due to their larger surface area and the electrical charges on their surfaces, which attract water molecules and create a lubricating layer.
Drying and Shrinkage
As clay dries, water evaporates, causing the clay particles to draw closer together. This results in shrinkage, which can lead to cracking if not managed properly. The type of clay and its mineral content play crucial roles in the drying process. Kaolin, with its larger particle size and lower plasticity, experiences less shrinkage compared to ball clay, which is more plastic and therefore shrinks more.
Firing and Transformation
Firing induces a series of chemical and physical transformations in the clay. The key reactions during firing include:
Dehydration: Around 100-200°C, physically bound water (pore water) evaporates.
Dehydroxylation: At approximately 450-600°C, hydroxyl groups in the clay minerals are expelled, converting kaolinite to metakaolin (Al₂Si₂O₇).
Quartz Inversion: Around 573°C, quartz undergoes a reversible transformation from the alpha (low) to beta (high) phase, which can cause expansion and contraction.
Vitrification: As the temperature increases (800-1300°C depending on the clay type), the silica and alumina components start to melt and form a glassy matrix. This process, known as vitrification, is crucial for developing the strength, density, and impermeability of the pottery.
Glazes and Surface Chemistry
Glazes are applied to pottery to add color, texture, and a protective surface. They are typically composed of silica (SiO₂), alumina (Al₂O₃), and various fluxes (e.g., sodium, potassium, calcium oxides) that lower the melting point of the glaze. During firing, the glaze melts and forms a glassy layer that bonds with the ceramic body. The specific composition of the glaze influences its melting behavior, thermal expansion, and final appearance.
Practical Applications and Considerations
For potters, understanding the chemistry of clay can significantly enhance their craft. Here are a few technical considerations:
Clay Selection: Choosing the appropriate clay type for a specific project is crucial. For instance, porcelain clays are ideal for fine, detailed work due to their high purity and translucency, while stoneware is better suited for functional items like plates and mugs due to its strength and durability.
Additives: Introducing materials like grog (pre-fired clay particles) or organic matter can modify the clay's properties, improving workability, reducing shrinkage, and adding texture. Grog, in particular, helps to reduce shrinkage and increase thermal shock resistance.
Firing Temperatures: Aligning the firing temperature with the clay type ensures proper vitrification and minimizes defects. Overfiring can lead to warping or bloating due to excessive vitrification, while underfiring can result in a weak, porous structure.
Conclusion
The intersection of pottery and chemistry reveals a complex interplay between materials and processes. By understanding the chemical composition and properties of clay, potters and material scientists can manipulate these variables to achieve desired results, creating pieces that are both aesthetically pleasing and functionally robust. Whether you're a seasoned potter or a curious enthusiast, exploring the chemistry of clay opens up new dimensions in the timeless art of pottery.
What we can learn about life from pottery
One of the initial lessons a potter learns is the virtue of patience. The process of working with clay demands time and attention, from wedging the material to centering it on the wheel. Every step in the process necessitates a deliberate, unhurried approach. Potters understand that rushing the process often leads to flawed results. Life, akin to clay, unfolds in its own time, and recognizing the value of patience is crucial in navigating its complexities.
Potters also appreciate the inherent imperfections in their creations. No two pieces are exactly alike, and kiln-firing may introduce unexpected variations. Rather than viewing flaws as defects, potters celebrate them as unique characteristics that add character and beauty. This perspective extends beyond the studio, teaching potters to embrace the imperfections in themselves and others, fostering a sense of acceptance and authenticity.
Working with clay is an ever-evolving process that demands adaptability. Potters must adjust to changes in moisture levels, temperature, and the unpredictable nature of the material itself. This adaptability extends into their approach to life, as potters learn to navigate uncertainties with grace and flexibility. Life, like clay on the wheel, is subject to constant change, and potters develop resilience in the face of unpredictability.
The act of creating pottery demands a deep level of concentration and mindfulness. Potters become attuned to the present moment, focusing on the texture of the clay, the rhythm of the wheel, and the subtle nuances of their movements. This mindfulness not only enhances the quality of their craft but also carries over into their daily lives. Potters learn to savor each moment, finding joy in the process rather than fixating solely on the end result.
Potters understand the delicate balance required to create a harmonious piece. Balancing form, function, and aesthetics is a constant consideration. In life, too, potters strive for equilibrium, recognizing the importance of balancing work and leisure, ambition and contentment. The pursuit of balance extends beyond the studio, shaping a holistic approach to well-being.
Beyond the tactile pleasure of working with clay, potters gain profound insights into life's intricacies. From patience and adaptability to embracing imperfections, their craft serves as a metaphor for navigating the human experience. The wisdom of potters extends far beyond the studio walls, offering valuable lessons for those willing to mold their lives with intention and mindfulness.
Well this happened…
Greetings, fellow pottery enthusiasts. Allow me to provide you with a general guide on the process of repairing and replacing bricks within your electric kiln. Maintaining the integrity of your kiln is paramount to achieving consistent and successful firing outcomes.
Commencing with a fundamental understanding of the Skutt electric kiln – comprised of an outer shell, an inner chamber lined with refractory bricks, and a heating element – it is imperative to address any signs of wear and tear promptly.Identification of Issues: The presence of cracks, fractures, crumbling, or irregular firing patterns serves as indicators that your kiln requires attention. These issues, if unattended, may compromise the uniformity of temperature distribution during firing.Initiating the Repair Process:
Preparation:Ensure the kiln is unplugged and has cooled down entirely.Remove debris and glaze drips while meticulously cleaning the bricks with a wire brush.
Application of Patching Compound:Mix a refractory patching compound as per the manufacturer's specifications.Apply the compound to the damaged areas, ensuring a smooth surface.Allow sufficient time for the patch to dry before initiating the firing process.
Crack Sealing:In the case of minor cracks, utilize refractory cement to seal and prevent further expansion.Apply the cement evenly along the crack, smoothing the surface with a putty knife.
Replacement of Bricks: Should the damage be extensive or irreparable, the replacement of affected bricks becomes necessary.
Sourcing Replacement Bricks:Contact Skutt or an authorized dealer to procure the exact replacement bricks suitable for your kiln model.Verify that the replacement bricks align with the dimensions and specifications of the original components.
Removal of Damaged Bricks:Delicately remove the damaged bricks, taking note of their arrangement and orientation.Employ a chisel and hammer to break up the damaged bricks, facilitating their removal.
Installation of Replacement Bricks:Position the new bricks in accordance with the original arrangement.Secure the bricks in place using refractory mortar, ensuring a secure fit.Allow the mortar to cure thoroughly before resuming kiln operations.
In conclusion, conscientious maintenance, timely repairs, and, if necessary, replacement of bricks within your Skutt electric kiln contribute significantly to its longevity and performance. By following this comprehensive guide, you will be well-equipped to address kiln brick issues, fostering optimal conditions for successful pottery endeavors. Detailed Signs Indicating Kiln Repair:
Visible Cracks and Fractures:Inspect the interior of your kiln thoroughly for any visible cracks or fractures in the refractory bricks. Even small cracks can lead to heat loss and affect firing results.
Crumbling or Deterioration:Check for areas where the bricks may be crumbling or showing signs of deterioration. If you notice chunks falling off or a powdery texture, it's a clear sign of wear.
Uneven Glaze Distribution:Examine finished pieces for uneven glaze distribution. If you consistently observe variations in glaze appearance, it could be indicative of uneven heating caused by damaged bricks.
Stalling Cone Situations:During firings, if you find that cones in different areas of the kiln are not bending or melting uniformly, it suggests an issue with temperature distribution. This can be a result of damaged bricks affecting heat circulation.
Altered Firing Schedule:If you've been using a consistent firing schedule, and suddenly experience changes in firing results, such as underfired or overfired pieces, it's a red flag that your kiln may need attention.
Abnormal Sounds or Odors:Unusual sounds, like popping or cracking, during a firing could indicate stress on the bricks. Additionally, if you notice strange odors that are not typical during firing, it may signal a problem with the kiln's components.
Fluctuating Temperature Readings:Keep an eye on your kiln's temperature readings. Drastic fluctuations or difficulty maintaining a set temperature are signs of potential issues with the kiln's elements or insulation.
Visual Inspection of Elements:Examine the heating elements for any visible damage. Broken or worn-out elements can lead to uneven heating and compromised firing results.
Electricity Consumption Changes:Monitor changes in electricity consumption. A sudden increase in energy usage without a corresponding change in kiln load or firing schedule may indicate inefficiencies in the kiln's performance.
Inconsistent Color Development:If you notice inconsistencies in the color development of your pottery, especially if some areas are consistently darker or lighter than intended, it may be a symptom of uneven temperatures within the kiln.
By paying attention to these detailed signs, you'll be better equipped to identify specific issues with your kiln, allowing for timely repairs and maintenance to ensure optimal performance and firing results.Unwrapping The Joy: Handmade Pottery Gifts: The charm of handmade gifts
We live in a world inundated with mass-produced goods. I myself love the convivence of ordering many of the items I need for the studio on Amazon. However, there's a unique charm in receiving a handmade gift. Handmade pottery gifts, in particular, carry a sense of authenticity and craftsmanship that elevates the joy of both giving and receiving. In this blog post, we'll explore the beauty of handmade pottery gifts and why they make for delightful and meaningful presents.The Artisan Touch: Handmade pottery gifts are crafted by skilled artisans who pour their passion and creativity into each piece. Unlike factory-produced items, these gifts carry the distinct touch of the artisan, making them one-of-a-kind treasures. This personal touch adds a layer of sentimentality that can't be replicated by mass-produced alternatives.Functional Beauty: Pottery gifts are not just aesthetically pleasing; they also serve practical purposes. From intricately designed mugs and bowls to elegantly crafted vases, each piece is not only a work of art but also functional in daily life. This dual purpose enhances the value of the gift, as recipients can enjoy both the visual and utilitarian aspects.A Connection to Tradition: Handmade pottery gifts often draw inspiration from traditional techniques and designs. Whether it's a rustic clay mug or a hand-painted plate, these gifts connect the recipient to the rich history of pottery-making. This sense of tradition adds depth to the gift, making it more than just an object – it becomes a piece of cultural heritage.Customization and Personalization: Unlike mass-produced gifts, handmade pottery items can often be customized to suit the recipient's preferences. From choosing specific colors to incorporating personalized messages or initials, the level of customization adds a thoughtful touch that shows you've put extra effort into selecting a gift that truly reflects the recipient's taste.Sustainability and Eco-Friendly Choices: Handmade pottery gifts are often crafted with sustainability in mind. Many artisans use eco-friendly materials and processes, promoting a more sustainable approach to gift-giving. This aligns with the growing trend of eco-conscious consumer choices and adds an extra layer of appeal for those who prioritize environmentally friendly products.Unique and Timeless Appeal: Handmade pottery gifts stand out for their uniqueness. When you choose a handmade piece, you're selecting something that isn't mass-produced and won't be found in every store. This exclusivity adds a touch of luxury and ensures that the gift remains timeless, transcending fleeting trends.
In a world driven by speed and mass production, the joy of receiving a handmade pottery gift lies in its authenticity, craftsmanship, and timeless appeal. Whether you're celebrating a special occasion or simply expressing your appreciation, these gifts have the power to create lasting memories. Choose handmade pottery gifts to give the gift of joy wrapped in the warmth of artisanal craftsmanship.Happy Holidays!!
The Loss of Gertsly Borate to Potter
In the world of ceramics, every ingredient plays a crucial role in achieving desired results. From enhancing the color palette to adjusting the viscosity of glazes, each component contributes to the final masterpiece. However, recent developments in the industry have sparked concerns over the availability of one such vital element: Gertsly Borate. This loss has left potters and ceramic artists searching for suitable substitutes to maintain the quality and integrity of their craft.
The Rise and Fall of Gertsly Borate: Gertsly Borate, also known as Colemanite, has long been a staple in the ceramics industry. Its unique properties, including fluxing capabilities and low thermal expansion, made it indispensable for formulating glazes and engobes. However, the availability of this mineral has dwindled in recent years due to various factors, including limited natural reserves and increased demand from other industries.
One significant blow to the supply of Gertsly Borate came from its use in boron-based fertilizers, which depleted the available stockpile for ceramic applications. Additionally, geopolitical tensions and trade restrictions further exacerbated the scarcity, leading to skyrocketing prices and dwindling accessibility for potters and ceramicists worldwide.
The Search for Substitutes: Faced with the scarcity of Gertsly Borate, potters and ceramic artists have embarked on a quest to find suitable alternatives that can replicate its unique properties. While no single substitute can perfectly mimic the characteristics of Gertsly Borate, several materials have emerged as viable alternatives:
Gerstley Borate Alternatives:
Frits: Boron-containing frits, such as Ferro Frit 3124 or Fusion Frit F-544, offer similar fluxing properties and can be used as direct replacements or in combination with other flux materials.
Borax: Borax, a boron compound, can be utilized to adjust glaze viscosity and promote melting, although it may require experimentation to achieve desired results.
Ulexite: Another boron mineral similar to Colemanite, ulexite, exhibits fluxing properties and low thermal expansion, making it a potential substitute for Gertsly Borate in certain formulations.
Reformulating Recipes:
Reformulating existing glaze recipes by adjusting the ratios of other flux materials, such as feldspars and frits, can help compensate for the absence of Gertsly Borate while maintaining desired glaze characteristics.
Collaboration and Knowledge Sharing:
Collaboration within the ceramics community, through forums, workshops, and online platforms, enables artists to share insights, experiences, and alternative recipes for navigating the Gertsly Borate shortage effectively.
Adapting to Change: While the loss of Gertsly Borate presents challenges for potters and ceramic artists, it also offers an opportunity for innovation and creativity. By embracing alternative materials and experimenting with new formulations, artisans can adapt to changing circumstances while pushing the boundaries of their craft.
Moreover, the shift towards sustainable practices in the ceramics industry encourages exploration of locally sourced materials and eco-friendly alternatives, reducing reliance on scarce resources and mitigating environmental impact.
The loss of Gertsly Borate has undoubtedly reshaped the landscape of the ceramics industry, prompting a reevaluation of traditional practices and materials. Yet, through collaboration, experimentation, and a willingness to adapt, potters and ceramic artists are finding innovative solutions to maintain the quality and integrity of their work.
As the quest for substitutes continues, the ceramics community remains resilient, drawing on its collective expertise and creativity to navigate challenges and forge new paths forward in the ever-evolving world of ceramic artistry.
What should we discuss in a pottery critique?
In a pottery critique, you can cover various aspects to provide constructive feedback and analysis of the artwork. Here are some points you may want to consider:Form and Shape:Evaluate the overall form and shape of the pottery.Consider the proportions and balance of the piece.
Technique:Assess the technical skills demonstrated in the creation of the pottery.Look at the consistency of the thickness of the walls, smoothness of surfaces, and precision in detailing.
Surface Treatment:Examine the surface finishes, such as glazes, textures, and any decorative elements.Comment on how the surface treatment enhances or detracts from the overall aesthetic.
Functionality:If the pottery is functional, evaluate how well it serves its intended purpose.Consider the ergonomics and usability of the piece.
Creativity and Originality:Discuss the originality of the design and how the artist has approached the creative process.Consider if the piece brings a unique perspective or if it follows traditional styles.
Concept and Intent:Explore the artist's intent and concept behind the work.Discuss how well the piece communicates the intended message or theme.
Craftsmanship:Assess the level of craftsmanship displayed in the pottery.Consider the level of skill demonstrated in the construction and finishing.
Context and Influences:Explore any cultural, historical, or personal influences that may be reflected in the pottery.Discuss how the work fits into the broader context of contemporary or historical ceramic art.
Critique Etiquette:Provide constructive criticism rather than simply pointing out flaws.Highlight both strengths and areas for improvement.Use clear and specific language to communicate your observations.
Remember that a critique is an opportunity for growth and learning, so it's important to approach it with a positive and constructive mindset."Sustainable Artistry: The Art of Recycling Clay in the Pottery Studio"
Explore the art of clay recycling in pottery studios with our simplified guide! From collecting scraps to crafting eco-friendly masterpieces, discover how recycling clay can benefit both your art and the planet. Turn leftover clay into textured wonders, making your studio practice more sustainable and budget-friendly. Join the movement towards mindful creativity and learn the steps to give your clay a second life. Uncover the secrets of recycling clay for a greener, more cost-effective pottery experience!
In the realm of pottery, where creativity meets craftsmanship, the focus on sustainability is gaining momentum. One of the key practices that embody this eco-conscious ethos is the recycling of clay in the pottery studio. Beyond the traditional wheel-throwing and hand-building techniques, artists are embracing the art of repurposing clay to reduce waste and contribute to a more sustainable creative process.
The Clay Recycling Process: Clay recycling in the pottery studio involves reclaiming and rejuvenating clay that has been discarded or has dried out. This process not only reduces the environmental impact but also presents artists with a unique opportunity to explore new textures and forms within their work. The journey from discarded clay to a revitalized artistic medium is both rewarding and environmentally responsible.
Collecting Scraps: The first step in recycling clay involves collecting scraps generated during the pottery-making process. This can include trimmings, failed pieces, or even clay that has dried out.
Breaking Down the Clay: Once the scraps are collected, they are broken down into smaller pieces. This can be done manually by wedging the clay, which involves kneading and compressing it to remove air pockets and achieve a uniform consistency.
Adding Water: Water is a crucial element in the clay recycling process. The broken-down clay is mixed with water to form a slurry or slip. This mixture is left to sit, allowing the water to fully permeate the clay particles.
Filtering and Settling: After sufficient soaking, the slurry is poured through a sieve or filter to remove any impurities or unwanted particles. The filtered clay water is then left to settle, with heavier particles sinking to the bottom.
Drying and Wedging: Once the excess water has evaporated, the reclaimed clay is ready for the final step – wedging. Wedging involves kneading the clay again to ensure uniform consistency and to eliminate any remaining air pockets.
Benefits of Recycling Clay:
Environmental Impact: Recycling clay significantly reduces the amount of clay waste ending up in landfills, contributing to a more sustainable and eco-friendly pottery practice.
Cost-Effective: By recycling clay, artists can save money on raw materials, making pottery more accessible and cost-effective, especially for those on a tight budget.
Exploration of Textures: Recycled clay often exhibits unique characteristics that can add depth and texture to the final artwork. Artists can embrace the unpredictability of recycled clay to create one-of-a-kind pieces.
Educational Value: Incorporating clay recycling into the studio routine provides an educational opportunity for artists to understand the material's life cycle, fostering a deeper connection with their craft.
Conclusion: In the pottery studio, the journey from discarded clay to a revitalized medium is a testament to the evolving landscape of sustainable artistry. Recycling clay not only aligns with environmental stewardship but also opens up new avenues for artistic exploration. As more artists embrace the principles of sustainability, the pottery studio becomes a space where creativity thrives in harmony with the planet.
Glazing Techniques
Unveil the secrets of pottery mastery with our latest blog post! Explore the world of Cone 6 glazes, the perfect balance of stunning colors and durability. Dive into techniques like dipping, brushing, and layering that are tailored to Cone 6 firing temperatures. But that's not all! Discover the artistic potential of slip decoration and stencils, adding intricate detailing to your pottery creations. Whether you're a seasoned ceramic artist or just starting, this blog will inspire and guide you toward creating pottery that truly stands out.
Introduction
Pottery is a timeless and versatile art form that allows artists to express their creativity while creating functional and decorative objects. When it comes to enhancing pottery with glazes and slip decorations at Cone 6 firing temperatures, you have a wide array of techniques at your disposal. In this blog post, we'll explore some glazing techniques tailored to Cone 6 firing, as well as incorporating slip decoration and stencils, helping you create pottery that boasts stunning effects, remarkable durability, and intricate detailing.
Understanding Cone 6 Glazes
Cone 6 glazes are formulated to mature at a specific temperature range, approximately 2,232°F to 2,372°F (1,222°C to 1,300°C). This firing temperature offers a balance between achieving vivid glaze colors and ensuring the pottery remains sturdy and functional.
Dip and Drip or Plunk and Dunk Technique
The dip and drip technique is a straightforward yet highly effective way to achieve beautiful glaze effects at Cone 6. In this method, you immerse your pottery piece into a container of Cone 6 glaze, ensuring complete coverage. As you let any excess glaze drip off, it naturally creates variations in glaze thickness. This technique is perfect for achieving a smooth and even finish that Cone 6 firing can enhance.
Brushing
Brushing Cone 6 glazes onto your pottery allows for precise control over your glaze application. Various brush sizes and types enable you to create intricate designs, patterns, or gradients with ease. The Cone 6 firing temperature ensures that the glaze matures beautifully, resulting in a glossy or matte finish, depending on the glaze formulation.
Layering and Overlapping
Experimenting with layering and overlapping Cone 6 glazes can yield stunning, multi-dimensional effects. By applying multiple layers of different glazes over each other, you can create unique color blends, textures, and depth. The Cone 6 firing temperature helps the glazes melt and fuse together, producing captivating results.
Wax Resist
The wax resist technique is a fantastic way to create contrast and intricate designs with Cone 6 glazes. By applying wax to specific areas of your pottery before glazing, you can prevent the glaze from adhering to those waxed portions. The Cone 6 firing process ensures the glaze adheres firmly to the exposed clay while producing a visually striking contrast between glazed and unglazed areas.
Sgraffito
Sgraffito is a timeless technique that involves scratching or carving through a layer of Cone 6 glaze to reveal the clay beneath. With the firing temperature of Cone 6, you can achieve sharp and detailed designs. Various tools, such as fine-pointed knives or dental tools, are often employed for precision. The contrast between the exposed clay and glazed surface adds depth and visual interest to your pottery.
Slip Decoration
Slip, a liquid clay mixture, offers endless possibilities for decorative embellishments. You can apply slip to your pottery before glazing to create raised designs, texture, or intricate patterns. The Cone 6 firing temperature ensures that the slip adheres securely to the clay and interacts harmoniously with the glaze for stunning visual effects.
Stencils
Stencils are a great way to achieve precise and repetitive designs on your pottery. You can create or purchase stencils in various shapes and sizes and apply them to your pottery before glazing. Once the glaze is applied and the pottery undergoes the Cone 6 firing process, the stencil design is revealed, adding a touch of uniformity or complexity to your pieces, depending on your artistic vision.
Conclusion
Mastering the art of glazing with Cone 6 glazes, slip decoration, and stencils opens up a world of creative possibilities in pottery. Whether you prefer the simplicity of the dip and drip technique or the intricacy of sgraffito, Cone 6 firing offers the ideal temperature range for achieving stunning results. By incorporating slip decoration and stencils, you can add even more depth and precision to your pottery creations. Remember that practice and experimentation are essential for discovering your unique style and pushing the boundaries of what's possible with Cone 6 glazes. So, roll up your sleeves, embrace the possibilities, and create pottery that showcases the remarkable effects achievable at this firing temperature while incorporating slip and stencils for that extra touch of uniqueness and artistry. Your Cone 6-glazed and slip-decorated pottery is sure to leave a lasting impression on all who admire it.
Different Types of Clay: Choosing the Right One for Your Pottery
Choosing the right clay for your pottery is like selecting the perfect instrument for a musical composition. Each clay type has its own melody to bring to your artistic symphony. Whether you're drawn to the rich warmth of earthenware, the elegant allure of porcelain, or the captivating unpredictability of Raku, your choice will shape the essence of your pottery. So, let's delve deeper into the clay realm and find the perfect match for your creative aspirations.
Introduction
When it comes to pottery, clay is your canvas, and choosing the right type of clay is crucial for your creative journey. The world of ceramics offers a diverse range of clay types, each with its unique characteristics and qualities. Whether you're a seasoned potter or just starting, understanding the different types of clay can help you bring your artistic vision to life. In this guide, we'll explore various clay options and help you decide which one is best suited for your pottery projects.
Earthenware Clay
Earthenware clay is one of the oldest and most accessible types of clay. It's known for its rich, warm colors and smooth texture. Earthenware clay is fired at a relatively low temperature, typically between 1,800 and 2,100°F (980-1,150°C). This clay type is excellent for beginners and is often used for creating decorative pottery, tiles, and tableware. It's easy to work with, making it perfect for hand-building and sculpting.
Stoneware Clay
Stoneware clay is a popular choice among many potters due to its versatility and durability. Fired at higher temperatures, between 2,200 and 2,400°F (1,200-1,320°C), stoneware clay becomes dense and vitreous. This results in pottery that is both sturdy and chip-resistant, making it ideal for functional pieces like dinnerware and mugs. Stoneware clay is also great for wheel-throwing and hand-building projects.
Porcelain Clay
Porcelain clay is often considered the pinnacle of clay types for pottery due to its elegant, translucent appearance. It fires at extremely high temperatures, typically between 2,300 and 2,600°F (1,260-1,430°C), resulting in a smooth, white surface. Porcelain is favored for delicate, fine pieces such as teacups, vases, and figurines. However, it can be challenging to work with due to its tendency to warp and its unforgiving nature when it comes to imperfections.
Raku Clay
Raku clay is known for its unique firing process. It is fired at lower temperatures, around 1,800°F (980°C), and is then rapidly cooled, often by placing it in combustible materials like sawdust or leaves. This process creates unpredictable and stunning glaze effects, making each piece one-of-a-kind. Raku pottery is often decorative and prized for its distinctive crackle patterns and vibrant colors.
Paper Clay
Paper clay is a modern innovation that combines clay with paper pulp or other organic fibers. This hybrid clay is incredibly lightweight and has excellent strength when fired. Paper clay is ideal for sculpting intricate and delicate forms, as it reduces the risk of cracking and allows for thinner walls in pottery pieces. Its flexibility and reduced shrinkage during drying make it a favorite for artists experimenting with unconventional shapes.
Red Clay
Red clay, often referred to as terra cotta, gets its distinctive color from the iron oxide present in the clay. It's a low-fire clay, typically fired between 1,800 and 2,100°F (980-1,150°C). Red clay is commonly used for making planters, garden pots, and decorative items due to its warm and rustic appearance. It's well-suited for both hand-building and wheel-throwing.
Conclusion
Choosing the right type of clay is a pivotal decision for any pottery project. Each clay type has its unique qualities, and your choice should align with your artistic vision and the intended purpose of your pottery. Whether you're drawn to the earthy warmth of earthenware, the versatility of stoneware, the elegance of porcelain, the unpredictability of raku, the delicacy of paper clay, or the rustic charm of red clay, experimenting with different clay types can unlock a world of creative possibilities. Remember that practice and experimentation are key to finding the clay that resonates with your style as a potter. So, roll up your sleeves, get your hands dirty, and let your imagination run wild in the world of pottery.
The History of Pottery: A Fascinating Journey
Pottery, a timeless art, emerged around 20,000 BCE as humanity's answer to practical needs.
Introduction
Pottery is an art form that has stood the test of time, weaving itself into the fabric of human history for thousands of years. From humble beginnings as functional vessels for storing food and water to becoming intricate works of art adorning homes and museums, the history of pottery is a fascinating journey that reflects the evolution of human civilization. In this blog, we will take a deep dive into the rich history of pottery, exploring its origins, development, and enduring significance.
The Birth of Pottery: Prehistoric Origins
Pottery has roots that stretch back to prehistoric times, making it one of the oldest human inventions. The earliest known pottery dates back to around 20,000 BCE, discovered in places like China and Japan. These early pottery items were simple, hand-formed containers made from clay. The primary purpose of these vessels was utilitarian, serving as storage for food and water.
The Wheel and the Rise of Civilization
Around 3,500 BCE, a monumental innovation occurred: the invention of the potter's wheel. This revolutionary device allowed potters to create symmetrical and finely crafted pottery with greater efficiency. It marked a significant step forward in the development of pottery, enabling the creation of larger vessels and more intricate designs. With the advent of the wheel, pottery production became a specialized craft, and distinct pottery cultures began to emerge around the world.
Glazes and Decorative Techniques
As civilizations advanced, so did pottery techniques. The introduction of glazes around 1,000 BCE in the Middle East brought a new dimension to pottery. Glazes, made from various minerals, not only added aesthetic appeal but also enhanced the functionality of pottery by making it impermeable to liquids.
Different regions developed unique decorative styles and techniques. In ancient Greece, pottery became an art form, with iconic red and black-figure pottery depicting myths, legends, and daily life. Meanwhile, Chinese porcelain, renowned for its delicate beauty, became highly sought after throughout the world.
Pottery as a Reflection of Culture
Pottery offers a window into the cultures and societies of the past. Each culture's pottery tells a unique story, reflecting its values, beliefs, and daily life. For instance, Native American pottery from the southwestern United States often features intricate geometric designs and earthy colors, reflecting the spiritual and cultural significance of the natural world.
Pottery Through the Ages
Throughout history, pottery has evolved alongside technological advancements. During the Renaissance, European potters were inspired by ancient Greek and Roman styles, leading to the creation of exquisite ceramic art. In the 18th century, the Industrial Revolution brought mass production to pottery, making it more accessible to a broader audience.
Contemporary Pottery
In the modern era, pottery continues to thrive as both an art form and a functional craft. Contemporary potters often push the boundaries of tradition, experimenting with innovative techniques and materials. From studio pottery to industrial ceramics, the art of pottery remains a dynamic and evolving field.
Pottery in the Digital Age
Even in the digital age, pottery maintains its allure. Online platforms have allowed potters to connect with a global audience, share their work, and explore new ideas. Social media has become a vibrant hub for ceramic artists and enthusiasts to exchange inspiration and knowledge.
Conclusion: The Timeless Beauty of Pottery
The history of pottery is a testament to human ingenuity and creativity. It has evolved from basic vessels to intricate works of art, shaping cultures and civilizations along the way. Pottery endures as a cherished form of self-expression and a medium through which artists continue to tell their stories.
As we look back on this fascinating journey through history, we find that pottery remains a timeless art form, transcending generations and connecting us to our ancestors. So, the next time you admire a beautifully crafted ceramic piece, remember that you are not just appreciating its aesthetics; you are also witnessing a piece of history, a testament to the enduring legacy of pottery.